
Hey Family Ever After readers! I'm so excited to be guest posting today for Rachel! My name is Jill and I blog over at I know the plans I have for you. I have always been crafty and have always liked to figure out how to make or do things (or RE-do things for that matter). But when I decided to start re-doing furniture I didn't just go for a piece needing a paint job (which I had never done), I decided to reupholster a couple of chairs. Go big, right? I had no idea, at the time, how to do anything with furniture and it was a LEARNING EXPERIENCE! That experience also introduced me to my passion of refinishing furniture. It has made a huge difference in my life and has given me an outlet to keep a stay at home mom of 3 and a wife sane! Today I would like to show you how to reupholster a bench:
For this project I needed:
a bench (obvious, right?)
wood glue
jute webbing
batting
paint
sandpaper
1 yard of fabric
trim
staple gun
staples
sissors
hot glue gun
glue sticks
My mom gave me this bench a few weeks ago


and I was shocked that she would give up such a piece of awesomeness! Ok, so it was broken, and the fabric was a hideous green vinyl, and it was pretty uncomfortable. But look at those legs! The shape and size of the bench was amazing. At first I thought about just doing a quick "cover it up", but I didn't want to feel the buttons under the fabric.
I began by removing the dust cover


Next I removed the trim and took off the fabric...
 Since the fabric on this bench was put on with tacks, not staples, which is much easier to remove and went quickly. I used Elmer's Wood Glue to reattached the piece of wood that had broken off years ago.

I waited a few hours for the glue to dry and then I painted using Annie Sloan Old White. Once I was finished painting and sanding it was time to add some new webbing. Normally you would probably do all repairs first, but I had the paint already and didn't have enough webbing. Also, since I was able to turn it upside down without messing up any paint (unlike a chair), the order didn't matter. I went to Joann's for the jute webbing and all they had was a little more than 2 yards so I was just going to have to make it work. Ideally, you want to have enough to cover the bottom of the seat. I was able to get by with what I had because not all of the original webbing was broken.

To attach the webbing, you begin in the center (going from side to side), stapling at one end and stretching the webbing taut to the other side and staple. Once you have attached the webbing going one direction, begin weaving the webbing across the seat.


I wanted to use the original cushion that was on it (foam is SUPER expensive) because it was in good shape, and because this bench was staying with me, it didn't bother me that there would be indentations from the buttons. If this is something that you come across, you can add on a thin piece of foam to give the seat a more square look (or in my case rectangle). I did add some batting by stapling it on as you would fabric.

You want to make sure that you start in the middle of each side working your way towards the corners, and doing the corners last.
Now it was time for the fabric.

I picked up this fabric a few months ago to use a different bench that I was making from a coffee table base. But I never finished that project. You know how that goes ;-) Lay the fabric over the bench and make sure that if you have a pattern in your fabric to pay attention to how that pattern is lined up. On mine it couldn't be 100% perfect because of how the person at the fabric store cut it. I couldn't center it just right because it didn't leave me enough room to staple it down on both sides. But again, it's just for me, so it's just fine.

Starting in the middle (I always start in the front), staple down the fabric and then on the opposite side hold the fabric taut and staple down. Do this on all 4 sides leaving the corners for last. On this particular piece I just folded the corners like you would do a present. Cut off the excess with a razor and your almost done.

I added a white, ruffled ribbon to cover the staples by simply hot gluing it on.

And tada....a new bench!!


This took me just an afternoon and because I had the fabric and the paint, and didn't completely replace the webbing, this little beauty cost me just 7 buckaroos!
Before and after:


Linking up:
For this project I needed:
a bench (obvious, right?)
wood glue
jute webbing
batting
paint
sandpaper
1 yard of fabric
trim
staple gun
staples
sissors
hot glue gun
glue sticks
My mom gave me this bench a few weeks ago


and I was shocked that she would give up such a piece of awesomeness! Ok, so it was broken, and the fabric was a hideous green vinyl, and it was pretty uncomfortable. But look at those legs! The shape and size of the bench was amazing. At first I thought about just doing a quick "cover it up", but I didn't want to feel the buttons under the fabric.
I began by removing the dust cover

 |
| I used this staple remover to remove the tacks....works awesome! |
which revealed why the bench was so uncomfortable! Most of the rubber webbing had snapped!
|


I waited a few hours for the glue to dry and then I painted using Annie Sloan Old White. Once I was finished painting and sanding it was time to add some new webbing. Normally you would probably do all repairs first, but I had the paint already and didn't have enough webbing. Also, since I was able to turn it upside down without messing up any paint (unlike a chair), the order didn't matter. I went to Joann's for the jute webbing and all they had was a little more than 2 yards so I was just going to have to make it work. Ideally, you want to have enough to cover the bottom of the seat. I was able to get by with what I had because not all of the original webbing was broken.
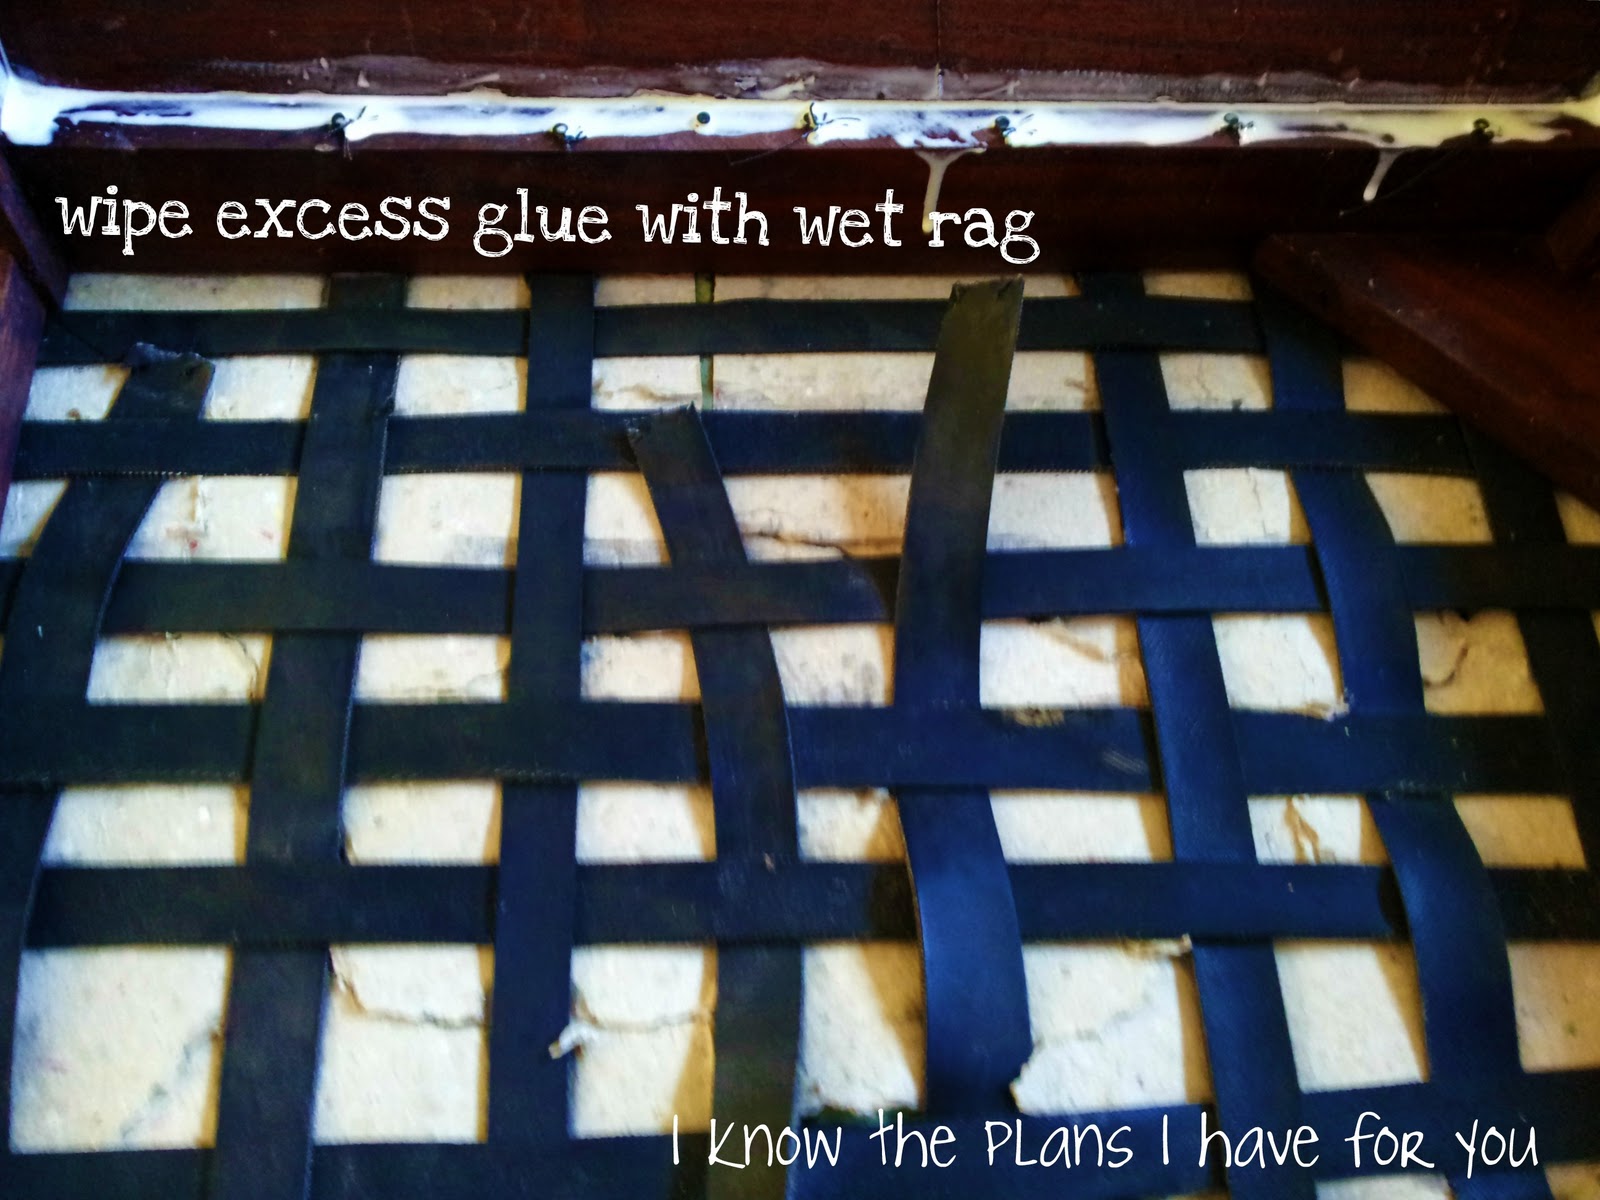


Since the rubber webbing in the center of the bench was still in tacked and I only had enough webbing for 2 long strips, I used the rubber webbing and started on the sides of it.

I wanted to use the original cushion that was on it (foam is SUPER expensive) because it was in good shape, and because this bench was staying with me, it didn't bother me that there would be indentations from the buttons. If this is something that you come across, you can add on a thin piece of foam to give the seat a more square look (or in my case rectangle). I did add some batting by stapling it on as you would fabric.

You want to make sure that you start in the middle of each side working your way towards the corners, and doing the corners last.
Now it was time for the fabric.

I picked up this fabric a few months ago to use a different bench that I was making from a coffee table base. But I never finished that project. You know how that goes ;-) Lay the fabric over the bench and make sure that if you have a pattern in your fabric to pay attention to how that pattern is lined up. On mine it couldn't be 100% perfect because of how the person at the fabric store cut it. I couldn't center it just right because it didn't leave me enough room to staple it down on both sides. But again, it's just for me, so it's just fine.

Starting in the middle (I always start in the front), staple down the fabric and then on the opposite side hold the fabric taut and staple down. Do this on all 4 sides leaving the corners for last. On this particular piece I just folded the corners like you would do a present. Cut off the excess with a razor and your almost done.

I added a white, ruffled ribbon to cover the staples by simply hot gluing it on.

And tada....a new bench!!


This took me just an afternoon and because I had the fabric and the paint, and didn't completely replace the webbing, this little beauty cost me just 7 buckaroos!
Before and after:


Thanks so much Rachel for letting me stop by and I hope that you guys have enjoyed this tutorial! I would love for you to come by I know the plans I have for you and look around!! I know how much inspiration I get from all of you great bloggers and I hope that you can find something to inspire you there!! Have a great weekend!!
 |
| Thrifty Decor Chick |
 |
| Not Just a Housewife |
Jill-
ReplyDeleteThis is awesome...to begin with that is my life verse :D. Your tutorial was awesome. I have never done anything with buttons or webbing or material other than clothes and bedding and pillows, and you get the idea, I have stripped and sanded and painted.
So...as I watched what you did I have a couple of questions (hope I don't sound to ignorant but here goes)
1. What would happen if you removed the buttons by carefully cutting the stitching? Would that destroy your cushion?
2. If you for whatever reason could not get the webbing in your illustration and all of the webbing was broken or rotted. Could you take apart a retro lawn chair and use it's webbing or a not so retro one that has solid "webbing" for the back and seat? Of course if you cut up the solid webbing I would think it would have to be sealed like ribbon or it would fray? Okay I guess question 2 has a part A and a part B Would it be possible to use the narrower (not sure what it is called)"webbing" that the stores sell. I use it to make my great nephew little belts. It is narrower, more the width of the original webbing, but do you think it would work?
3. Yes foam is expensive. I have learned that Michaels, Hancock Fabrics, JoAnn Fabric and Crafts all take each others coupons. Hobby Lobby some will price match, some will take other stores coupons and some will do neither. A lot of times if you are not in a hurry wait to buy your foam NOT when it is on sale, but when you have a 40 or 50% off coupon as it usually only gets marked down 30%. If you can be really patient as opposed to instant gratification wait until one of the stores has a coupon for another % of your entire purchase. Yes, you can use both coupons. Not only can you use both, you can use the ones for the highest percentage off. i.e. this last week I used one of the store's coupons and they and Michaels had the % off entire purchase. The stores was 10% and Michaels was 20% and I was able to use the Michaels one. Yes, foam is expensive, but if it's for you and you can make your self wait...you can save your self some $$$. Thanks again for the tutorial it was excellent! Most of all thanks for sharing my verse!
WOW!! That is a fantastic (now)! I love the fabric you chose too...very fun. :)
ReplyDeleteI love this bench!! I love the fabric, the cute legs..the trim...the whole thing! Great job!! So fun! I am going to pin it too!
ReplyDeleteKarin
What a transformation! Amazing bench!
ReplyDeleteWow, wow, wow!!! Your new bench is stunning! There is nothing I don't love about it!!!
ReplyDelete