Showing posts with label painting furniture. Show all posts

Thursday, January 16, 2014

My favorite Milk Paint Color...Tricycle {Desk Redo}

Hey! I hope everyone is having a great week and making some fun plans for the weekend! I get to see Sesame Street Live this weekend with my 3 year old, my cousin and her {almost} 2 year old. I can't wait to see the reactions on the girls faces when they see Elmo right in front of them! Any fellow St. Louis bloggers going??


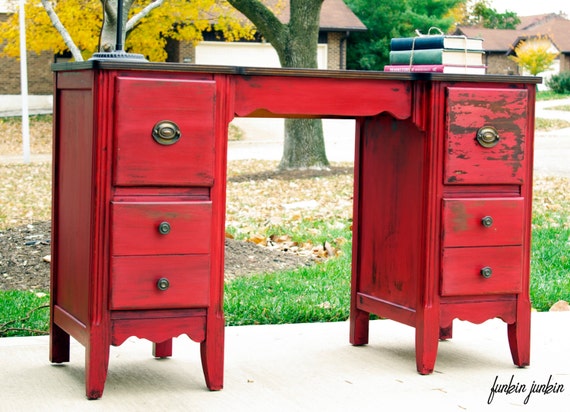
Well this is actually a piece I redid a couple of months ago, but hadn't shared yet. I also know that I took before pictures but my computer broke, and when I sent it in to get it fixed, I think that I lost them. Or at least for now, I'll just say that I haven't located them :( . I really love this 1940's vanity/desk. I personally can only see it used as a desk, but I know originally it was made as a vanity. I love the chippy goodness!

Here is what I did:
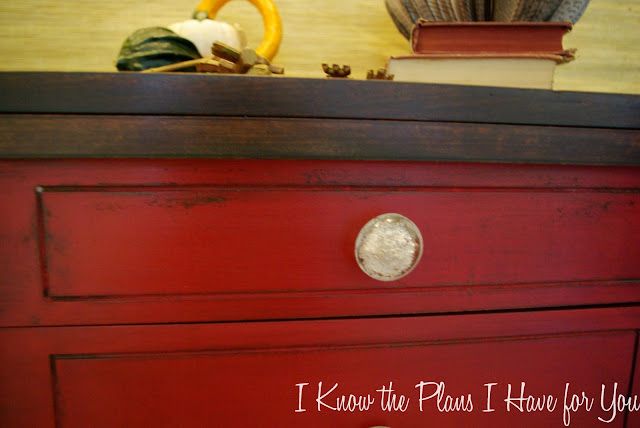
I stripped the top, and re-stained it using my go to stain...Minwax Walnut. I love the dark richness of the brown. I applied 2 coats of the milk paint (I've also used it here & here). This time I tried a different method of mixing the paint though. In the past projects, I just stirred, and stirred, and stirred some more. I have found that the red is a difficult color to mix. I've even added a little dawn soap before mixing it. This time I put it in a food processor (one that will not be used again for food), and it mixed up beautifully! I loved how creamy the texture was, and it applied SO smoothly. I also have the mixer that looks like a milk frother (is that what you call it?) Maybe it is an actual milk frother that I picked up one day while getting some milk paint. It works pretty well. I think I like the food processor better, but the clean up is a breeze with the "frother". What do you use to mix your milk paint? I'd love to hear! Ok, back to the desk.... After the paint dried, I used a paint scraper gently over the parts that were already chipping, and then sanded the entire desk with a fine sanding block. I used a mixture of dark and clear wax all over the red, and 2 coats of dark wax on the top. The hardware is all original. I was a little sad that this piece sold so quickly (thankful of course), but I just loved looking at it, and I know that it went to a wonderful new home. I can't keep everything, right??


Thanks for stopping by! What is your favorite milk paint color? I'd love to see your projects!


Linking up: 

 
[Continue reading...]

Wednesday, January 8, 2014

Funkin Junkin

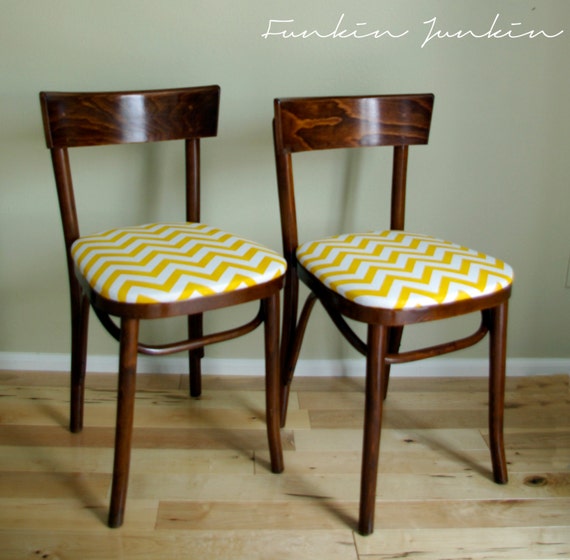
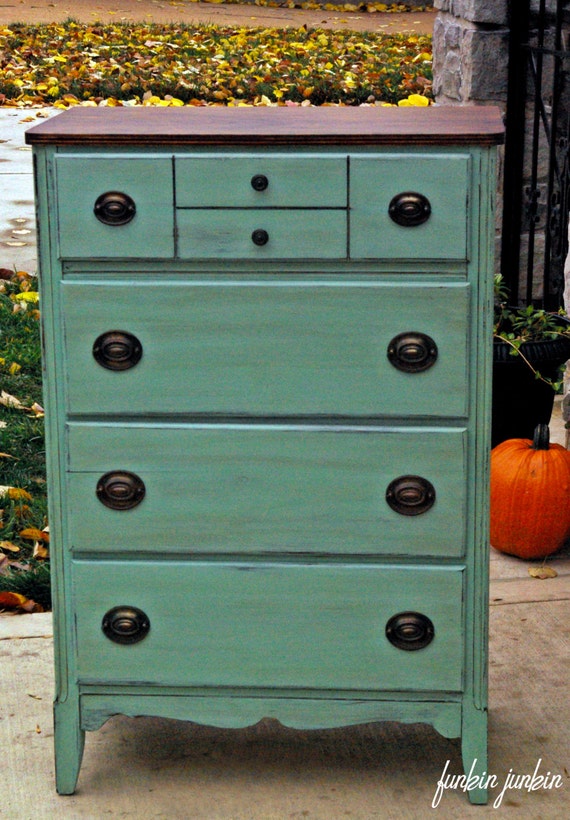
Hi all! I know that it has been FOREVER since I have blogged here, but I have had tons of changes in my life and also trying to blog a bit at Funkin Junkin. A few months ago, my husband and I separated, and I am slowly but surely getting into the groove of my new life in a new place with 3 kids. I have been refinishing furniture full time, while trying to keep my 3 year old occupied. Not always successful with that one, but who is?? I started selling my furniture on Etsy, (you can check it out here) and that has proven to be very successful! I wish now that I would have gone that route from the start. I am hoping to find more time to fill up the shop, but here is the newest addition and are some pics of what I have done previously.


I love the story of the chairs and will tell you about them in another post :) But here is what they looked like before


Thanks for stopping by!
Photobucket


[Continue reading...]

Wednesday, February 20, 2013

Labor of LOVE {bench redo}

I know I say this A LOT....but I can't believe how long it's been since I've posted! I have been doing SO many amazing projects (at least I think so) and I am so excited to share them with you guys! Over the next few days, I'll show you the different projects. This one has a bit of picture overload, but don't miss the free printable at the end of the post :)

I am going to start with this one, because it was intended for Valentine's Day, but I can't pass up sharing it just because cupid has left the building! When I was thinking of something special that I wanted to make for Valentine's day, I didn't want it to be only specific to the "Love Day". Who wants to put in hours of work, to have to shove the decor into a box till next year?? Not this gal!

I decided that I was going to make a wood subway sign for the wall, that says "I LOVE YOU", in lots of different languages. I first designed it, which you can feel free to download the free PDF file.


I sized it to the wood I was using, so you can just resize it to fit your project. I printed it out (in 3 pages) and taped the paged together. Then I spent way too long (I won't even get into it) transferring it to the wood. Here it is in pencil...

I'm not sure where I went wrong after this, but let's just say that this was my first truly failed project. I think I ran out of patience with this one once I started painting the words. So a few days went by, and I decided to paint this bench.

I didn't have any intentions on painting the sign on it, but my sister-in-law suggested it. At first I thought....she's crazy! I'm not wasting all that time again!! But I'm a glutton for punishment.
[Continue reading...]

Thursday, October 25, 2012

My buffet has found a friend! (Tricycle Milk Paint Sewing Machine Table)


I have been over the moon at the results of my buffet redo, and the wonderful feedback that I have received! Thank you all so much. Your comments have made me feel so great! It's put the fire back into the passion I have for working with furniture. There is just something so special about taking something that is either so-so, or someone's "trash", and putting new life into it. As I have been on my hunt for things to redo, I have found it to be hard to contain my urge not to take in every good deal, or freebies that have my name written all over them. We are in a much smaller place, so the option for hoarding things....well, is NOT an option. So I have had to pass on a few things, but one little gem that I found, was a free sewing machine table. I've seen lots of cute sewing machine tables, but have never actually found one quite like this. And did I mention it was FREE?? I of course  had every intention on selling this piece. Especially because I refinished it in the same way as I did my buffet. It was a quick makeover. The top had some scratches and a ring from a glass, so I stripped the top and stained it with dark walnut. 


The wood had a beautiful dark finish, so without hesitation, I painted 2 coats of MMS Milk Paint in Tricycle. My fav! Unlike the buffet (which had a coat of ASCP in Graphite) and held the milk paint on great, I painted this strait onto the old finish. I was SO pleased to find that a couple hours later, that beautiful crackle and chipping naturally happening. I left it overnight to see if more of the paint would chip off as time went by. It did :)! I used a scrapper to rub off the peeling paint, and gently sanded the rest to distress. The way it looks aged is so natural, and perfect. I then waxed the entire piece with clear and dark wax. I didn't think that I could love a piece of furniture as much as my buffet, but once I added the new knobs, and put it in my small entry way...it fits perfectly, AND I think I love it even more!! The finish is so smooth, just like on the buffet, but the consistency of color is much more smooth on the table. To me it looks like part of a set, and I don't think I can bring myself to sell it. I didn't have anything in that space, because it is so small and narrow. But with this table being narrow, and tall, I think that it is perfect! I think that the transformation is perfect too! I wonder if the guy that gave this away would change his mind if he saw it like this?


I just LOVE the chippiness!


I think that it needs a shelf put back in here, don't you?


 I had to show my pumpkin again ;-) and my gourd that looks like a swan...


One part that I haven't tackled yet is the inside of the table. I don't think that I want to strip it and stain it (although that would make sense). I feel that, although it won't be used as a sewing machine table, I would still like that part of it not forgotten about. I thought that it would be cute to paint the inside and transfer or hand paint some beautiful graphics that I found at the Graphics Fairy. Here are a few options that I've found:


What do you think, would you bother with the inside? I thought that if it is ever opened and used as a writing table, or whatever, there would be a little extra element of surprise. 


Pin It!
Linking up:
Photobucket


[Continue reading...]

Saturday, March 17, 2012

ASCP Pure White Dresser

I've been so busy lately that I haven't had a chance to post about my daughter's dresser redo!

I have had this dresser since my son was born almost 9 years ago! It has made it through 2 kids without hardly a scratch on it (does pencil count? Nah) Obviously a couple of the knobs went missing, but other than that, it was in perfect shape. The only problem was, it didn't match anything in her room. At one point I contemplated selling it because it is a little small, but then I thought, so is Gabby!


I used Annie Sloan Chalk Paint in Pure White which is such a beautiful, bright white. It's definitely a color to keep on hand at all times!  Yes, I painted it in the living room! I tend to get my painting projects done after the kids go to bed, so usually it's not till about 9, and I didn't want to have to leave it outside. It took 2 good coats and after I sanded it I added a very thin 3rd coat. I did sand it outside because it would have been such a mess. I think it is the heaviest piece of furniture in the house! Not really, but man, I had a hard time moving it even with my husband!! After the dresser was sanded smooth, I brushed on  2 coats of polycrylic only on the top, sanding between coats to remove the horrible brush strokes. I knew that the polycrylic does that before I did it, but the top really needed a good top coat and I was afraid that the wipe on poly would yellow. I love the feel of the chalk paint without a finish, so I knew that I would love the flat, silkiness on the rest of the dresser. I also don't mind any natural distressing that could happen over time.  I changed the wood hardware to black ceramic knobs. Eventually I want to change the hardware to glass knobs, but I these will have to do for now. I love how the dresser turned out!  Now it has a "girly" new look for my daughter and matches her crib. This dresser could last for many more year to come!

p.s. I know that you have seen these pictures before from my lamp shade post but those were the only pictures I took of the after.

Thanks for stopping by! I would love to hear what you think and if your not already one of my awesome followers I would love for you to stick around through GFC or Linky
 
[Continue reading...]

Friday, March 16, 2012

Crib turned Craft Station!


To VOTE head on over here and scroll through the bottom of the projects and click on the blue vote now. I'm #10  Thanks!!

I can't believe I'm back for week 2 of American Crafter!! All of the contestants are SO talented! I have been having so much fun with this contest. It really makes you dig into the creativity bin from within! But so far, this has to be my all time favorite project. This week the theme was "KIDS" so I just knew that my kids would be thrilled to know that they would benefit from what ever I chose to make. A couple of months ago, while searching Pinterest, I saw this:
{source}

How creative is that?! Well, I love a Pinterest challenge (as you might already know from this post), and this was the perfect time to take this one on!! I had a crib in the garage that someone had given to me for my daughter, but it was a drop front crib, so I was nervous to use it.

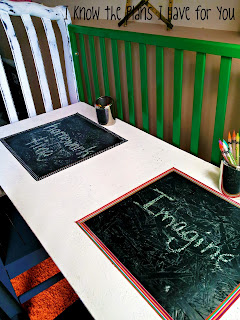
It really is a nice crib and had I thought about it before getting my daughter a different one, I could have just put brackets on the front so that it wouldn't go up and down. Good thing I didn't though! Because now it looks like this:

Here are the supplies I used and what I did to achieve this:
a crib
ASCP Pure White
ASCP Graphite
Valspar gloss luscious green spray paint
Krylon Chalkboard Spray Paint
Sanding blocks fine/medium
grow grain ribbon
Sharpie Oil-Based Medium Point Paint Marker
dark wax
chalk
2 chairs
polyurethane
plywood
circular saw
2 hinges
4 corner brackets
painters tape
hot glue
glue gun

I don't have pictures of the entire process because I ended up in a time crunch, but I'm sure you can picture it. I started by painting the sides of the crib with the pure white and wanted them to be distressed a good amount. Then I spray painted the back with the green spray paint. (I'll warn you, I have a lot of pictures!!)


This crib had a slide out drawer which is what I used for the table. I painted it with Graphite and used dark wax to seal it. All of these things were easy! It would be the table top that would be the challenge. My friend had a huge piece of press board that she didn't need, and I knew that would save me quite a bit of money, so I was determined to make it work. I set the drawer on top of it and traced the size I needed, leaving about an inch in the front to have an area for the kids to be able to lift it up. Using a circular saw (for the first time!) I cut it down to size.

It obviously doesn't have a finish on it that could be sanded smooth, and splinter free. So my options were to cover it with something hard and smooth, or figure out something else. Since I didn't have anything on hand to cover it with, I had to think of the something else. I decide to put multiple coats of polyurethane on it to "fill in" and seal the wood

To my surprise, it worked!! So now that the wood was smooth (for the most part), I sprayed 2 areas with the chalkboard paint.


Using painters tape, I taped off the 2 sections that I wanted for the chalkboards and painted the rest with ASCP Pure White. I decided not to seal any of the top, so technically the entire thing is a chalkboard. 
Since this is for my son and daughter, I wanted to give them each their own area. Using the ribbon that had pink in it, I framed one side for my daughter Drew, and using a brown ribbon with blue polka dots, I framed the other side for Nick. (Sorry there aren't pictures of any of these steps) Then using the hinges, I attached it to the drawer, so they could use the drawer for storage! Now it was time to turn the crib into a craft station. Since the kids aren't so little anymore, I wanted to make sure that it wasn't only high enough for them to use now, but to be able to use it for quite some time. I drilled new holes into the sides of the crib and bolted on L shaped corner brackets. Then I was able to just set the "table" onto the brackets and secure it all with screws underneath.
That took care of the table, but now they needed somewhere to sit! I have a pretty big collection of chairs to redo, so that was no problem! These would be perfect!
I used 2 coats of ASCP Graphite and with a Sharpie Paint Pen I put their names of the back. And tada.....they have a great space to do their homework and crafts!!


 I loved doing this project so much! And the kids are THRILLED with it!! I hope you like it as well! You can see it at naptimecrafters.com  and I would LOVE  it if you would vote for it! The contest is based on votes, so I can use ALL the help I can get!! Voting is open NOW! :-) I hope to make it to next week and show ya what I come up with! Thanks so much for stopping by! I would love to hear what you think!!

Sharing at these lovely parties:
Debbie Does Creations: Toot Your Horn Tuesday
Tatertots and Jello: Weekend Wrap Up
MMS
Redoux
Sweet Little Gals: Turquoise Lovin'
Creation Corner 
A Little Knick Knack
Funky Junk Interiors: Saturday Night Special
Kitchen Fun with My 3 Sons
Handy Man, Crafty Woman: Wicked Awesome Wednesday
Days of Chalk and Chocolate: Latest and Greatest
Thrifty Decor Chick: March before and after
Fireflies and Jellybeans: Show off your stuff
Six Sisters' Stuff: Strut Your Stuff
Addicts (not so) Anonymous 
French Country Cottage: Feathered Nest Friday
The Shabby Nest: Frugal Friday
Little Becky Homecky: Fantabulous Friday
Family Ever After....Once Upon a Weekend
Craft-O-Maniac
A Simply Klassic Home: Simply Klassy Sunday
Flamingo Toes: Think Pink Sundays
The Tattered Tag: {k.i.s.s.}
Twigg studios: Sunday Showoff
How To Nest for Less: Just a Party with My Peeps
Kammy's Korner: Trash 2 Treasure Tuesday
The Shabby Creek Cottage: Transformation Thursday
Savvy Southern Style: Wow Us Wednesdays
Crafty Scrappy Happy: Crafty Scrappy Happy Me Thursday 
Live Laugh Rowe: Live Laugh Linky Thursday
Jillify It
52 Mantels: Thursdays Are YOUR Days
Craft Test Dummies: Kid's Craft Week Round Up
Craftionary: Friday Fun
2805: Potpourri Friday
Cherished Handmade Treasures: Creative Corner Hop
Chatty Chics: Your Turn! Wild Wednesday!
[Continue reading...]

Total Pageviews