Showing posts with label MMS milk paint. Show all posts

Thursday, January 16, 2014

My favorite Milk Paint Color...Tricycle {Desk Redo}

Hey! I hope everyone is having a great week and making some fun plans for the weekend! I get to see Sesame Street Live this weekend with my 3 year old, my cousin and her {almost} 2 year old. I can't wait to see the reactions on the girls faces when they see Elmo right in front of them! Any fellow St. Louis bloggers going??


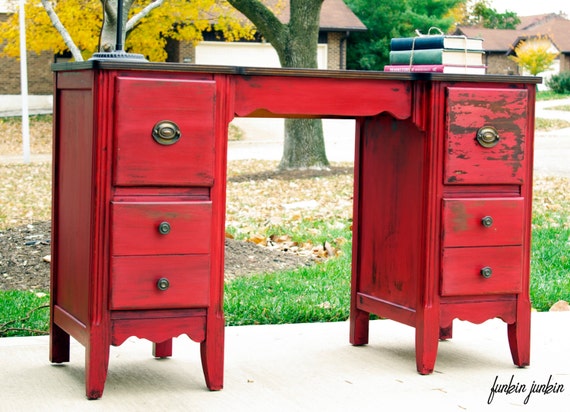
Well this is actually a piece I redid a couple of months ago, but hadn't shared yet. I also know that I took before pictures but my computer broke, and when I sent it in to get it fixed, I think that I lost them. Or at least for now, I'll just say that I haven't located them :( . I really love this 1940's vanity/desk. I personally can only see it used as a desk, but I know originally it was made as a vanity. I love the chippy goodness!

Here is what I did:
I stripped the top, and re-stained it using my go to stain...Minwax Walnut. I love the dark richness of the brown. I applied 2 coats of the milk paint (I've also used it here & here). This time I tried a different method of mixing the paint though. In the past projects, I just stirred, and stirred, and stirred some more. I have found that the red is a difficult color to mix. I've even added a little dawn soap before mixing it. This time I put it in a food processor (one that will not be used again for food), and it mixed up beautifully! I loved how creamy the texture was, and it applied SO smoothly. I also have the mixer that looks like a milk frother (is that what you call it?) Maybe it is an actual milk frother that I picked up one day while getting some milk paint. It works pretty well. I think I like the food processor better, but the clean up is a breeze with the "frother". What do you use to mix your milk paint? I'd love to hear! Ok, back to the desk.... After the paint dried, I used a paint scraper gently over the parts that were already chipping, and then sanded the entire desk with a fine sanding block. I used a mixture of dark and clear wax all over the red, and 2 coats of dark wax on the top. The hardware is all original. I was a little sad that this piece sold so quickly (thankful of course), but I just loved looking at it, and I know that it went to a wonderful new home. I can't keep everything, right??


Thanks for stopping by! What is your favorite milk paint color? I'd love to see your projects!


Linking up: 

 
[Continue reading...]

Wednesday, January 8, 2014

Funkin Junkin

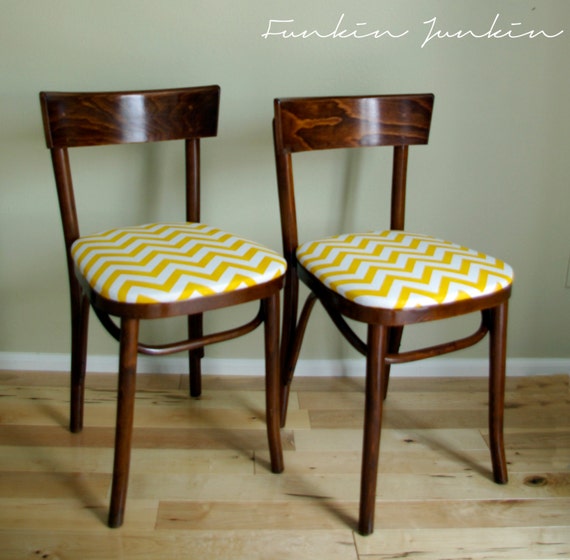
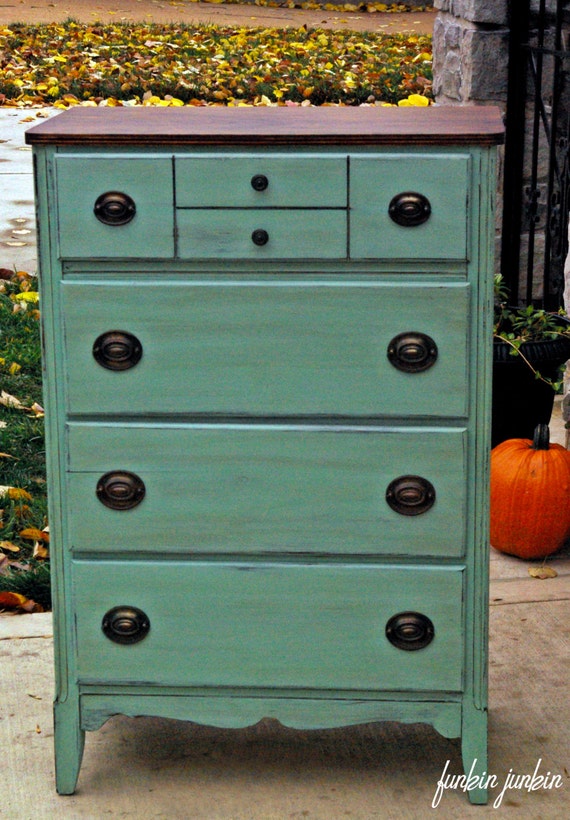
Hi all! I know that it has been FOREVER since I have blogged here, but I have had tons of changes in my life and also trying to blog a bit at Funkin Junkin. A few months ago, my husband and I separated, and I am slowly but surely getting into the groove of my new life in a new place with 3 kids. I have been refinishing furniture full time, while trying to keep my 3 year old occupied. Not always successful with that one, but who is?? I started selling my furniture on Etsy, (you can check it out here) and that has proven to be very successful! I wish now that I would have gone that route from the start. I am hoping to find more time to fill up the shop, but here is the newest addition and are some pics of what I have done previously.


I love the story of the chairs and will tell you about them in another post :) But here is what they looked like before


Thanks for stopping by!
Photobucket


[Continue reading...]

Thursday, October 25, 2012

My buffet has found a friend! (Tricycle Milk Paint Sewing Machine Table)


I have been over the moon at the results of my buffet redo, and the wonderful feedback that I have received! Thank you all so much. Your comments have made me feel so great! It's put the fire back into the passion I have for working with furniture. There is just something so special about taking something that is either so-so, or someone's "trash", and putting new life into it. As I have been on my hunt for things to redo, I have found it to be hard to contain my urge not to take in every good deal, or freebies that have my name written all over them. We are in a much smaller place, so the option for hoarding things....well, is NOT an option. So I have had to pass on a few things, but one little gem that I found, was a free sewing machine table. I've seen lots of cute sewing machine tables, but have never actually found one quite like this. And did I mention it was FREE?? I of course  had every intention on selling this piece. Especially because I refinished it in the same way as I did my buffet. It was a quick makeover. The top had some scratches and a ring from a glass, so I stripped the top and stained it with dark walnut. 


The wood had a beautiful dark finish, so without hesitation, I painted 2 coats of MMS Milk Paint in Tricycle. My fav! Unlike the buffet (which had a coat of ASCP in Graphite) and held the milk paint on great, I painted this strait onto the old finish. I was SO pleased to find that a couple hours later, that beautiful crackle and chipping naturally happening. I left it overnight to see if more of the paint would chip off as time went by. It did :)! I used a scrapper to rub off the peeling paint, and gently sanded the rest to distress. The way it looks aged is so natural, and perfect. I then waxed the entire piece with clear and dark wax. I didn't think that I could love a piece of furniture as much as my buffet, but once I added the new knobs, and put it in my small entry way...it fits perfectly, AND I think I love it even more!! The finish is so smooth, just like on the buffet, but the consistency of color is much more smooth on the table. To me it looks like part of a set, and I don't think I can bring myself to sell it. I didn't have anything in that space, because it is so small and narrow. But with this table being narrow, and tall, I think that it is perfect! I think that the transformation is perfect too! I wonder if the guy that gave this away would change his mind if he saw it like this?


I just LOVE the chippiness!


I think that it needs a shelf put back in here, don't you?


 I had to show my pumpkin again ;-) and my gourd that looks like a swan...


One part that I haven't tackled yet is the inside of the table. I don't think that I want to strip it and stain it (although that would make sense). I feel that, although it won't be used as a sewing machine table, I would still like that part of it not forgotten about. I thought that it would be cute to paint the inside and transfer or hand paint some beautiful graphics that I found at the Graphics Fairy. Here are a few options that I've found:


What do you think, would you bother with the inside? I thought that if it is ever opened and used as a writing table, or whatever, there would be a little extra element of surprise. 


Pin It!
Linking up:
Photobucket


[Continue reading...]

Wednesday, October 17, 2012

Miss Mustard Seed Milk Paint Tricycle (Buffet Makeover)

I've definitely been MIA here at my little blog home, and sporadic with my post when I am around, so I am very sorry for that. I've been battling a cold that has knocked me on my you know what, and today went back to the doctor for the second time, diagnosed with Pneumonia or Bronchitis. With a medicine cabinet full of prescriptions, tonight, I am finally able to breath. My kids have also, for the past 3 weeks, been passing around strep throat. Needless to say, I've been a little overwhelmed and withdrawn. BUT, sick as I may be, I haven't been lacking in getting projects done! Today I want to share with you a piece that is so special to my heart. My grandmother passed away 9 years ago. Although I have many things of hers that she left for me, it wasn't until long after her passing that this buffet came into my home. 


 I have always loved it, but the color {for me} not so much. I love its masculine shape as well as the quality of the piece. It has made a great stand for our TV,  but I've had great plans for it. I was just getting ready to redo it with Annie Sloan Chalk Paint (which I just ♥), UNTIL...I found out that I could get Miss Mustard Seed's Milk Paint only 5 minutes from my house!! Red Posie is THE cutest little vintage furniture shop in old town St. Charles. If your local, you MUST check it out!

My original plan for the buffet was to paint it black and stain the top walnut. But, I have to say that every red piece that I have ever seen in blogland, just jumps out at me. So, I decided to paint it using Tricycle.

It's a little shocking at first sight, right?? I know. Don't be afraid!! You won't regret it.
I'll start from the beginning....
It has a veneer top that's chipped in a few places, but I knew that I would be able to strip it down easily and thought I would just repair the chips. I first stripped the top of the buffet using {spray} Klean-Strip Stripper. It is so easy to use, and so much less messy than the brush on kind, and in my opinion much less stinky (and I had to use it inside). Spray it on, let it sit about 15 minutes, and scrape off. Easy peasy!

 What you scrape off REALLY looks disgusting (and is!). Make sure you wear gloves. It will burn your skin pretty quickly.

I didn't take pictures of the staining process, but once the top was stripped, I gave it a good sanding and 2 coats of Minwax dark walnut stain. The chipped parts took the stain so well, that I didn't even need to repair them. I love that it isn't perfect, and the stain really hides the imperfections. Before you paint, you want to fill in any knob or pull holes that you won't be using. Then it's time to paint!

If you aren't familiar with Milk Paint, the first thing you should know, is that it comes in powder form. You just mix it with warm water. The second thing you should know, is that it has a mind of its own as far as how it will adhere to your piece. If you know that you don't want that chippy look, there is a bonding agent that you could mix into the paint. I really love chippy furniture and wanted that for this piece, but like I said before, I'm not fond of the lighter wood. So instead of adding the bonding agent, I first applied a coat of ASCP in Graphite so that any of the milk paint that didn't stick would show a darker layer. (Don't you just love the top??)


I have to admit that I was a little intimidated by mixing the paint, but you can find a great video here. I'm not sure where I read this next tip, but somewhere I read that the red powder was a little hard to mix. You can add a little liquid soap to the mixture to help break it down and using just a little does not affect the way the paint adheres. I found out that it was hard to mix, and added just a drop of Palmolive. Worked great. It still took a lot of mixing and you will still have some lumps but that is ok. Another thing to remember is to CONTINUE TO MIX THROUGHOUT THE PAINTING PROCESS.  The powder will settle at the bottom, so you want to make sure that you keep mixing it. Again, I didn't take pictures of this process, because it was late and the lighting just wasn't good. I brushed on 2 coats waiting about an hour between coats. The paint dries pretty quick and I didn't sand in between coats. Once both coats were dry, I used a little sand paper and a sanding block to bring out the darker paint in areas. The paint goes on SO smooth, there really wasn't any brush marks. Along with the paint, I also purchased the Antiquing Wax.

This was my favorite part! I love this wax! It is a soft wax that I applied with a brush pretty much on the entire thing. It really toned down the red and and the color is amazing. You brush (or wipe) it on, wait about 5 minutes and buff to a nice satin sheen. I also used it on the top, but I'm not sure that I would recommend that, only based on the price of the wax. I also added glass knobs. Here is what I ended up with, and I have never been happier with anything that I have redone! Get ready for picture overload:


Did you notice my book pumpkin?? Cute right?


And I'll have to tell you about my vintage number clock redo in the next post!


Pin It!

I'd love to hear what you think! Thanks for stopping by :)


Sharing at:
Furniture Feature Friday
Inspiration Friday
[Continue reading...]

Total Pageviews